

Replacing a bathroom faucet sounds like a repair job, but in many cases it is really a simple upgrade that changes how the whole basin area looks and works. If the old faucet leaks, feels loose, has weak water flow, or no longer matches the sink design, replacement is often a better choice than repeated repair. A new faucet can improve daily comfort, reduce splashing, and bring a cleaner look to the bathroom.
For most standard basin setups, the process is straightforward as long as you prepare the tools, confirm the mounting style, and install the water lines correctly. This is especially true for compact single-handle models designed for low-profile basins, where the structure is clean and the operation is easier to manage.
A faucet usually gives clear signs before replacement becomes necessary. Water dripping from the spout, stiffness in the handle, unstable hot and cold mixing, and corrosion around the base are some of the most common problems. Sometimes the issue is not a major failure. The faucet may still work, but the water flow is uneven, the finish is worn, or the overall height no longer fits the basin properly.
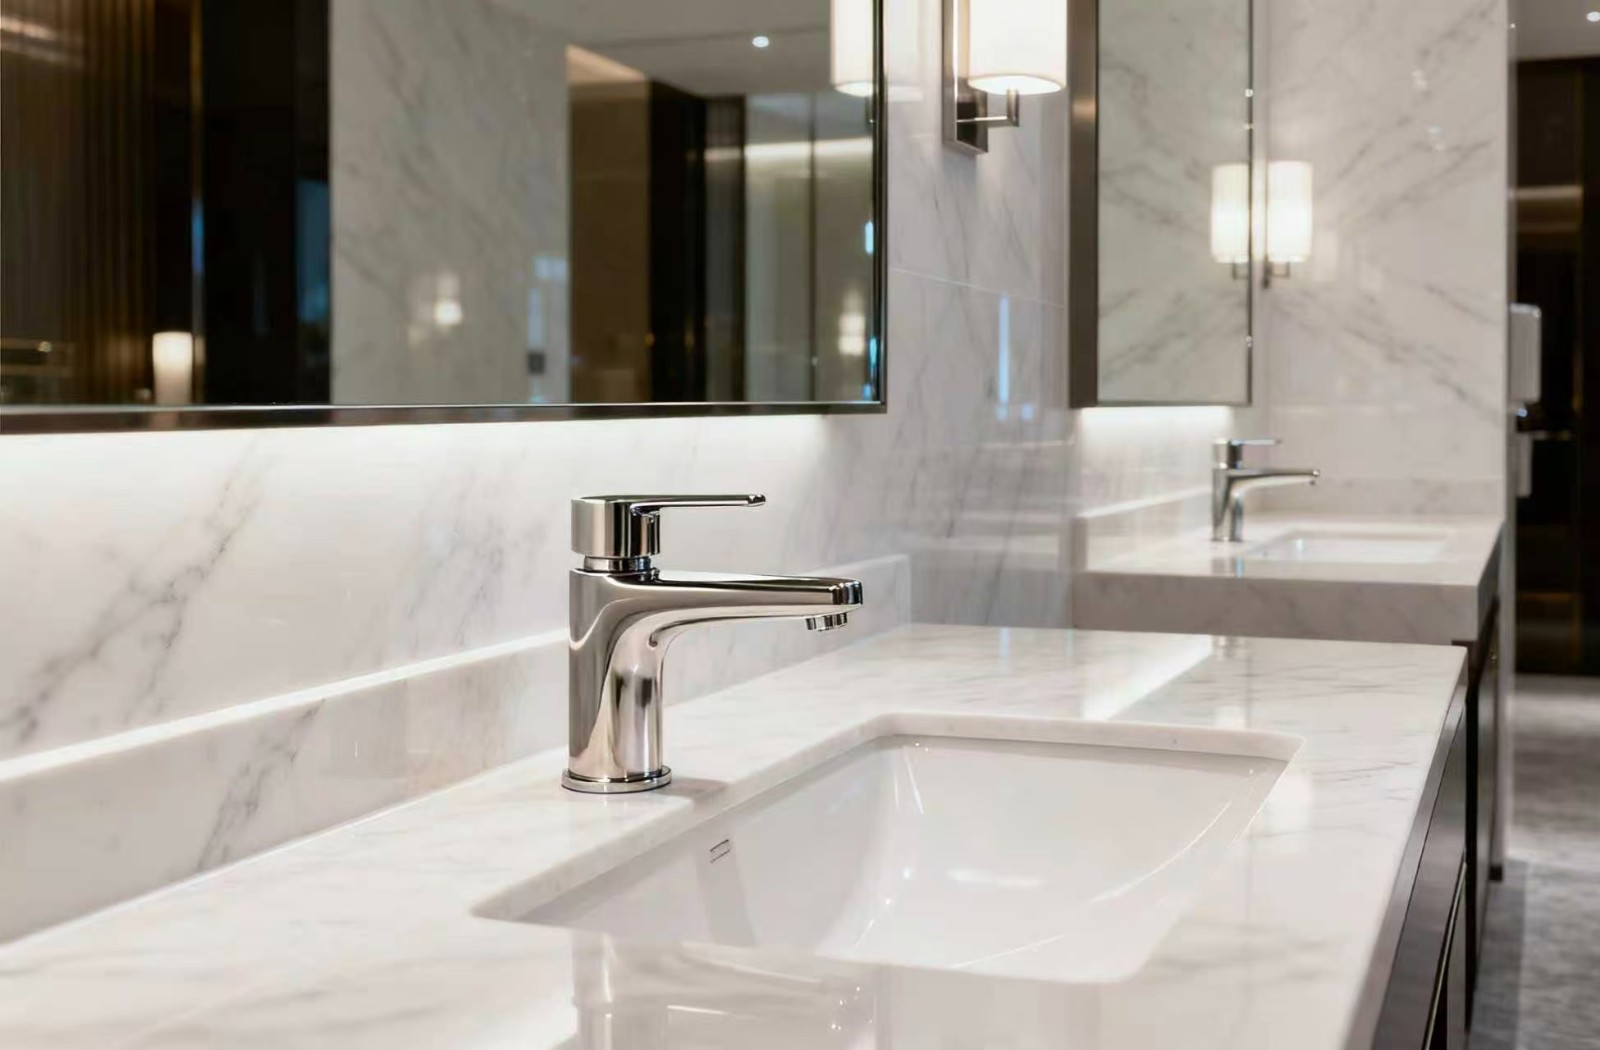
This is where product choice matters. A low-profile Basin Faucet is often a practical replacement for modern bathrooms because it keeps the sink area visually neat and better matches shallow or compact basins. A short-profile design also helps avoid an oversized look, especially in smaller vanity spaces.
Before removing the old faucet, turn off the water supply valves under the sink. Then open the faucet to release any remaining pressure in the lines. Place a towel or small container under the basin to catch any residual water when the hoses are disconnected.
You will usually need a wrench, a screwdriver, sealing tape, and a cloth for cleanup. It is also worth checking the new faucet package in advance to make sure the mounting hardware, hoses, and sealing parts are complete. This step saves time once installation begins.
A single-lever faucet with integrated hot and cold control is often easier to replace than more complex multi-piece designs. It reduces the number of visible components and makes the under-sink connection cleaner.
Start by disconnecting the hot and cold water hoses from the shut-off valves. Once the hoses are free, loosen the mounting nut that secures the faucet under the basin. In older installations, mineral buildup may make this step harder, so a little patience helps.
After the nut and washer are removed, lift the old faucet out from above the sink. Clean the installation area before placing the new faucet. This part is often overlooked, but any old sealant, dirt, or corrosion left around the hole can affect how firmly the new faucet sits.
A clean surface helps the replacement faucet seal better and look more aligned after installation.
Insert the new faucet through the mounting hole and keep it centered as you fit the gasket and fixing hardware from below. Tighten the mounting nut enough to hold the body firmly, but do not overtighten. Too much force can damage threads or create stress around the basin opening.
Next, connect the inlet hoses to the faucet body and then to the shut-off valves. Most installations follow the standard hot and cold arrangement, so it is important to keep the lines correctly matched. Wrapping the threaded connections with sealing tape can help improve the seal and reduce the chance of leakage.
For a compact basin faucet, stable installation is important because the body is lower and visually closer to the sink deck. Any tilt or looseness becomes easier to notice. Once tightened properly, the faucet should feel firm and balanced.
When everything is connected, slowly turn the water supply back on. Check the hose joints, the base of the faucet, and the shut-off valve connections for any sign of leakage. Then lift and turn the handle to test both hot and cold water flow.
A good faucet should give smooth handle movement, steady water output, and controlled switching between temperatures. Models fitted with a ceramic cartridge usually feel more precise in operation, while a quality aerator helps soften the stream and reduce splashing. This is especially useful in basin areas where water can easily hit the sink edge.
If the water pressure seems weak at first, the aerator may simply need a short flush to clear trapped debris from the installation process.
One of the most common mistakes is buying the wrong faucet height for the basin. A faucet that is too tall may create splashing, while one that is too bulky can look out of proportion on a low-profile sink. Another mistake is ignoring the mounting method and hose length before installation.
It is also common for people to overtighten the mounting parts or hose connections. This does not make the faucet safer. Instead, it can damage components and cause leaks later. A secure fit is important, but controlled tightening is just as important.
Choosing the right material also affects long-term results. A brass body is usually preferred for daily bathroom use because it offers better durability and corrosion resistance than lighter-grade alternatives. For buyers looking beyond simple replacement, this makes the upgrade more worthwhile over time.
Replacing a bathroom faucet is not only about fixing a plumbing issue. It is also about improving the sink area in a practical way. A well-chosen faucet should match the basin depth, fit the installation hole correctly, and provide easy everyday control.
A single-handle faucet is often the more convenient option because it simplifies temperature adjustment and keeps the top view uncluttered. In compact bathrooms, a short-profile design can also create a more refined appearance. Finish choice matters too. Chrome, matte black, gold, gunmetal, or matte white can all change the visual tone of the vanity area without requiring a full renovation.
For this reason, replacement is often treated as a small upgrade project rather than just maintenance.
If you want to know how to replace bathroom faucet units correctly, the key is to keep the process simple: turn off the water, remove the old unit carefully, clean the mounting area, install the new faucet securely, and test every connection before regular use. Most replacement jobs are manageable when the faucet structure is clear and the installation parts are complete.
A compact basin faucet with a durable brass body, smooth cartridge control, and water-saving outlet design is often a practical choice for modern bathroom spaces. It makes daily use more comfortable while improving the overall look of the sink area.
If you are choosing a replacement faucet and are not sure about style, basin compatibility, finish, or installation details, feel free to contact us. We can help you compare options, review product specifications, and provide practical guidance for your project or bulk purchasing needs.

 Mobile Phone:
 Phone:
 Contact Now