

Installing a bathtub faucet looks straightforward at first, but a proper result depends on more than simply tightening fittings. The final performance is shaped by valve positioning, pipe alignment, sealing quality, pressure testing, and compatibility between the faucet body and the bathtub layout. If one of these steps is handled poorly, the faucet may drip, sit crooked, create weak flow, or develop hidden leaks behind the wall or under the deck.
This guide explains how to install a bathtub faucet in a clear, professional way, covering wall-mounted, deck-mounted, and freestanding installation logic. The goal is not only to help you complete the job, but to help you avoid the common mistakes that affect appearance, water control, and long-term reliability. You can explore HAOJIAJIA solutions on our bathtub faucet page.
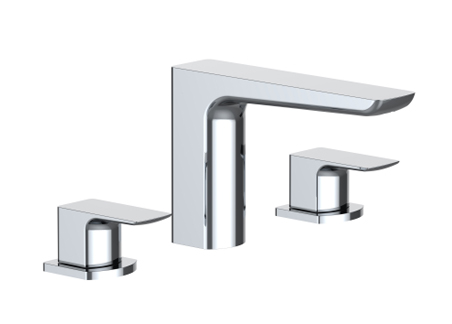
Before installation starts, the first task is identifying the faucet type. A bathtub faucet may be wall-mounted, deck-mounted, or floor-standing. Each type uses a different rough-in structure and requires different preparation.
A wall-mounted bathtub faucet usually connects to concealed hot and cold water outlets inside the wall. The installation depends heavily on the rough-in accuracy, because once tile or wall panels are closed, adjustment becomes limited. A deck-mounted bathtub faucet is installed directly onto the tub deck or a nearby platform. In this case, hole spacing, deck thickness, and access under the mounting surface matter more. A freestanding bathtub faucet stands on the floor next to the tub and requires floor-based water supply planning and stronger anchoring.
Understanding the faucet type before work begins helps avoid the most common installation problem: preparing the wrong mounting method for the chosen product.
A bathtub faucet should never be installed before verifying the rough-in dimensions. The faucet body may look visually centered, but if the pipe spacing is wrong or the outlet height is inconsistent with the tub edge, the finished result will feel awkward and may create splashing or poor flow direction.
For wall-mounted models, the hot and cold supply centers must match the faucet standard. The outlet should sit at a height that allows smooth water delivery into the tub without hitting the inner wall too aggressively. For deck-mounted models, the faucet holes must align with the product specification and leave enough room below the deck for hose connection and tightening. For freestanding models, the floor supply points must align precisely with the faucet base to maintain a clean vertical appearance.
This is where a practical bathtub faucet installation always begins: with dimension confirmation rather than hardware assembly.
A reliable installation depends on a clean and stable mounting area. Shut off the water supply completely and open the old faucet or valve to release residual pressure. If replacing an existing faucet, remove old fittings carefully and clean away scale, sealant residue, and debris around the mounting points.
At this stage, it is also important to inspect pipe ends and thread quality. A faucet can only seal properly if the connection surfaces are sound. Damaged threads, pipe burrs, or misaligned stub-outs can create small leaks that become larger problems later. If concealed plumbing is involved, confirm that the wall cavity or access opening remains reachable until pressure testing is complete.
For wall-mounted bathtub faucets with concealed valves, the rough-in body is the heart of the installation. It must be fixed securely inside the wall and aligned both horizontally and vertically. If the rough-in body is too deep, the trim kit may not reach the finished wall surface correctly. If it is too shallow, the cover plate may not sit flat.
The hot and cold inlet orientation must also be correct. Reversing these lines is a surprisingly common mistake and creates immediate usability problems after installation. Once the rough-in body is fixed in position, connect the water lines according to the manufacturer’s direction and keep the valve body stable during tightening so internal seals are not twisted.
A durable bathtub faucet system depends on this hidden stage more than many users realize. If the concealed structure is installed accurately, the visible trim later becomes much easier to align and seal.
When connecting threaded pipe joints, sealing must be controlled rather than excessive. Thread seal tape or an approved sealing compound should be applied evenly, with attention to the thread direction so it does not bunch during tightening. Overuse of sealant can interfere with clean seating and may even create connection distortion.
Flexible hoses, when used in deck-mounted or freestanding faucets, should be routed without sharp bending. Twisted hoses reduce flow efficiency and can shorten service life. Compression or threaded joints should be tightened firmly but not overstressed. Overtightening can damage gaskets or crack fittings, especially on plated decorative parts.
This step may appear simple, but connection quality is what separates a clean installation from one that begins leaking after a short period of use.
Once the supply side is ready, the visible faucet body or trim set can be installed. This is where finish appearance becomes important. A bathtub faucet should sit straight, feel secure, and line up cleanly with the tub geometry.
For wall-mounted models, install escutcheons or cover plates so they sit flush to the wall and cover the penetrations evenly. For deck-mounted units, seat the faucet base with the correct gasket or sealing ring before tightening from below. For freestanding models, align the faucet body with the tub centerline or intended use point, then secure the base firmly to avoid movement during operation.
A custom bathtub faucet with a distinctive shape or larger body often needs even more attention during alignment, because any visible deviation is easier to notice once the bathroom is complete.
After assembly, restore water supply gradually and test the system before sealing the work area completely. Check both hot and cold lines, confirm the handle direction is correct, and inspect all joints for leaks under pressure. If the faucet includes a handheld shower or diverter, test the switching action and ensure there is no dripping from the inactive outlet beyond the normal brief residual release.
This stage is also the time to observe water flow direction. The spout should send water clearly into the tub without splashing onto the rim or outer surface. Poor flow direction may indicate a wrong installation height, a misaligned spout, or excessive pressure for the current setup.
Many bathtub faucet issues that appear after installation can be traced back to a few recurring causes. Uneven trim usually comes from inaccurate rough-in depth or loose mounting. Leaks around connections often come from poor thread sealing, damaged gaskets, or overtightening. Weak flow may indicate twisted hoses, blocked aerators, or undersized supply lines. Temperature reversal almost always points to crossed hot and cold inlets during rough-in.
The most effective way to avoid these issues is to test step by step rather than waiting until the entire bathroom is finished. In real projects, early correction is always faster and cleaner than later rework.
| Faucet Type | Main Installation Focus | Common Risk |
|---|---|---|
| Wall-mounted bathtub faucet | Rough-in depth, center spacing, trim alignment | Hidden leaks or incorrect valve depth |
| Deck-mounted bathtub faucet | Hole spacing, deck access, hose routing | Tight access and twisted supply lines |
| Freestanding bathtub faucet | Floor supply alignment, base anchoring, vertical positioning | Visible leaning or unstable base |
This comparison helps identify where attention should be concentrated before installation begins.
Even a well-prepared installation site depends on the faucet itself being dimensionally accurate and structurally reliable. Stable cartridge construction, precise machining, good plating quality, and consistent connection threads all influence how smoothly the installation proceeds. This is why project buyers often prefer working with a bathtub faucet supplier that understands both product manufacturing and installation practicality.
HAOJIAJIA, as a bathtub faucet manufacturer, focuses on designs that support both visual appeal and installation usability. If you are planning residential, hospitality, or project-based bathroom developments, you can review suitable options on our bathtub faucet page.
Installing a bathtub faucet correctly requires more than attaching the visible fixture. The key steps are identifying the faucet type, confirming rough-in dimensions, preparing clean and sound connections, securing the concealed or visible body accurately, and testing flow and sealing before final completion. When these stages are handled carefully, the faucet will not only look right but also perform reliably over time.
If you are selecting a bathtub faucet for a new bathroom project or need support comparing installation-friendly designs, contact HAOJIAJIA for product guidance and specification support. Our team can help you evaluate suitable models based on mounting type, project style, and supply layout.
Previous: How Do You Remove A Bathtub Faucet?

 Mobile Phone:
 Phone:
 Contact Now