

Installing a shower system is not only about attaching a shower head. A complete system involves water supply connection, secure mounting, leak control at threaded joints, and correct alignment so the Shower Arm, handheld set, or rail stays stable under daily use. Done properly, installation improves water flow consistency, reduces dripping and thread damage, and helps the shower look clean on the wall instead of uneven or loose.
This guide explains how to install a shower system in a professional, practical way. It focuses on the most common wall-mounted shower configurations, including fixed shower heads, handheld shower sets, and rail-based systems. You can view HAOJIAJIA options on our shower head collection.
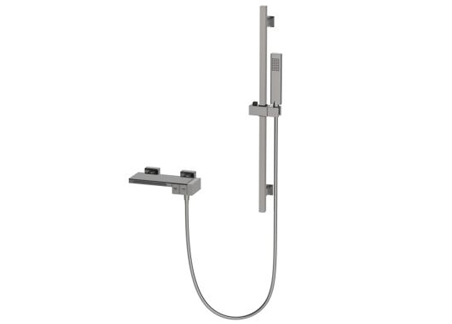
The first step is identifying what you are installing, because the method changes depending on the parts included. Some shower systems are a simple fixed head that connects to an existing shower arm. Others include a handheld shower with a wall bracket and hose. Some include a rail that supports a sliding holder, which requires precise wall drilling and stronger anchoring. If your set includes multiple components, the installation sequence matters, because you want the plumbing connections complete before the final wall alignment and tightening.
Also confirm whether you are installing on existing threads or opening the wall for a new rough-in valve. This article focuses on surface installation using existing supply points, which is common in upgrades, rentals, and renovation refresh projects.
A shower system is installed in a wet environment, so the wall condition matters as much as the fittings. Tile, stone, and waterproof panels require the correct drill bit and careful hole placement to avoid cracks. Drywall without reinforcement needs appropriate anchors so the bracket does not loosen over time.
On the plumbing side, threaded joints must be sealed correctly. The standard approach is PTFE thread seal tape applied in the correct direction so it tightens with the fitting, or a compatible thread sealant if your local practice allows it. Over-tightening can strip threads or damage finishes, while under-tightening causes slow leaks that appear weeks later.
If you are installing in a hard-water area, flushing the line briefly before final assembly helps remove debris that can clog flow restrictors and cause uneven spray patterns.
Turn off the water supply before you remove any existing shower head or hose. When you unscrew an old fitting, keep a cloth ready because residual water will drain from the arm.
After removing the old part, clean the exposed threads. Old tape, hardened sealant, or mineral deposits can prevent a tight seal. A clean thread surface is one of the simplest ways to reduce future dripping.
If the shower arm is loose or angled incorrectly, correct it before installing the new shower head. A well-aligned arm reduces stress on the fitting and supports a cleaner final look.
Most fixed shower heads install directly onto the existing shower arm thread. Apply PTFE tape to the shower arm thread, wrapping in the direction that the shower head will tighten. Then screw the shower head on by hand until snug, and finish with a gentle final tighten using a wrench with a protective cloth to avoid scratching.
The goal is a secure seal without forcing the joint. If you need to keep a specific spray face direction, stop at the correct position and adjust the tape wrap if needed rather than applying excessive torque.
A durable shower system installation depends heavily on clean threads and correct sealing, because small leaks can damage the wall over time.
For a handheld shower, connect the hose to the outlet and the handset. Most hoses use washers to seal rather than thread tape. Ensure the washers are seated correctly and tighten by hand. Over-tightening can deform washers and create leaks later.
The wall bracket should be positioned where the handset can be reached easily and the hose can hang without sharp bends. Mark the hole positions, drill slowly with the correct bit for your wall surface, and insert anchors that match your wall type. After mounting the bracket, confirm it does not move under light pulling force.
If your shower set includes a rail, keep it vertical by using a level. A small tilt looks minor at installation but becomes noticeable once the slider is used daily.
Turn the water back on and test the system before you fully finish. Check each connection point for slow drips, especially at the shower head thread and any hose joints. A leak that looks small under low pressure can worsen when the shower is running hot, because heat changes material expansion and can reveal weak seals.
Also check spray performance. If water flow seems restricted, confirm that any flow control insert is seated correctly and that debris has not entered the fitting during installation.
This is the stage where practical adjustments save the most time. It is easier to correct alignment and sealing now than after the wall mounts are fully tightened and cleaned.
One common issue is leaking at the shower arm thread. This typically comes from insufficient thread sealing or tape wrapped in the wrong direction. Another issue is a loose wall bracket, which usually comes from incorrect anchors or drilling through cracked tile. A third issue is twisting the hose into a tight bend, which can shorten hose life and affect how the handset sits.
In projects where appearance matters, align the shower head face and bracket positions carefully. Clean away marker lines and seal around drilled holes if your local waterproofing practice requires it.
| Component | Typical Connection | Seal Method | Main Check Point |
|---|---|---|---|
| Shower head to shower arm | Threaded | PTFE tape or thread sealant | Drip-free at joint |
| Hose to outlet and handset | Threaded with washer | Washer seal | No drip under hot water |
| Wall bracket or rail | Screws and anchors | Wall anchor stability | No movement when pulled |
| Handset holder | Clip or slider | Mechanical fit | Smooth adjustment and hold |
This reference helps ensure each joint is treated with the correct sealing method instead of using tape everywhere.
If the project involves multiple outlets, specific height requirements, or a consistent installation style across many units, a custom shower system configuration can reduce installation time and improve uniform appearance. For example, selecting a consistent bracket spacing, hose length, and spray head style helps standardize maintenance and replacement across apartments, hotels, and renovation programs.
HAOJIAJIA supports a range of shower head and shower set options designed for straightforward installation and stable daily use. You can review styles on our shower head collection.
Installing a shower system successfully comes down to correct preparation, proper thread sealing, stable wall mounting, and a careful leak test before final tightening. When the shower head, hose, and bracket are installed with clean threads, correct washers, and accurate alignment, the system stays secure, performs consistently, and maintains a clean appearance on the wall.
If you are selecting shower systems for a project, renovation program, or bulk supply plan and want guidance on configuration, compatibility, or installation details, contact HAOJIAJIA. Share your wall type, existing connection points, and preferred functions, and we can recommend practical options and support your selection.
Previous: How To Install Bathtub Faucet?

 Mobile Phone:
 Phone:
 Contact Now