

Replacing a bathtub faucet is a practical home improvement task that improves water control, resolves leaks, and updates the overall appearance of a bathroom. Although bathtub faucets vary in structure, most replacement projects follow a clear logic once the faucet type and connection method are understood. This article explains how to replace a bathtub faucet step by step, focusing on preparation, removal, installation, and testing. The guidance applies to common bathtub faucet configurations and aligns with modern designs such as those found in the HAOJIAJIA bathtub faucet collection, which are designed with standardized connections for easier replacement.
The first and most important step is identifying the faucet type already installed. Bathtub faucets differ in how they connect to plumbing, and the replacement method depends on this structure rather than appearance alone.
Common bathtub faucet types include:
Wall-mounted spout-only faucets
Wall-mounted faucet sets with spout and handles
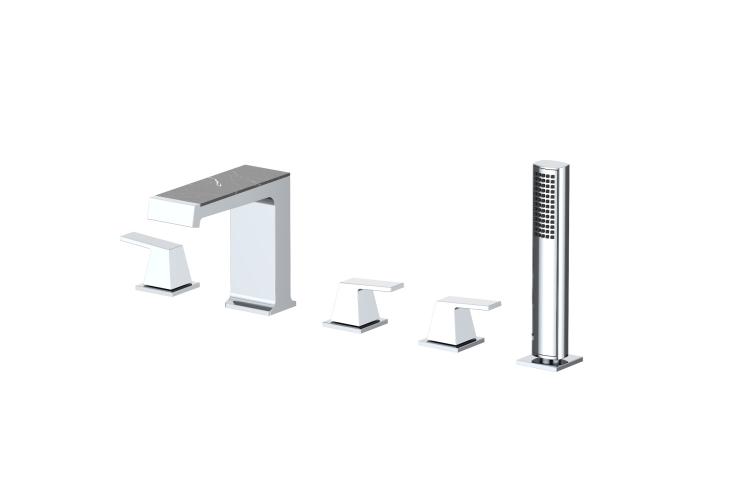
Deck-mounted bathtub faucets
Floor-standing bathtub faucets
Each type connects differently to the water supply. For example, wall-mounted spouts may be threaded or slip-fit, while deck-mounted faucets are secured from below the tub rim. Correct identification ensures the new faucet is compatible with existing plumbing and avoids unnecessary wall or tile damage.
Proper preparation prevents water damage and makes the replacement process smoother. The water supply must always be shut off before removing any bathtub faucet components.
Preparation steps include:
Turning off the main water supply or local shutoff valves
Opening the tub faucet to drain residual water
Covering the drain to prevent small parts from falling in
Protecting tub and tile surfaces with cloth or padding
This stage is also a good opportunity to inspect the surrounding wall or deck area for signs of moisture damage that may need attention before installing the new faucet.
Faucet removal depends on the connection method. Wall-mounted tub spouts typically attach in one of two ways: threaded or slip-fit.
For threaded spouts, the faucet is rotated counterclockwise until it comes off the pipe. Slip-fit spouts are secured with a set screw underneath, which must be loosened before pulling the spout straight off. Handle assemblies and trim plates are removed next to expose valve components if needed.
During removal, avoid applying excessive force. Old pipes can loosen inside the wall if stressed. Modern faucet designs, including many HAOJIAJIA bathtub faucet models, are designed for clean installation and removal without damaging internal plumbing.
Once the old faucet is removed, the exposed pipe or valve connection should be carefully inspected. This step is often overlooked but plays a critical role in long-term performance.
Check for:
Corrosion or mineral buildup on threads
Cracks or deformation at pipe ends
Misalignment between spout outlet and wall surface
If threads are damaged, repairs should be made before installing the new faucet. Applying thread seal tape or replacing worn fittings ensures a tight seal and prevents future leaks.
Installation begins by matching the new faucet to the existing connection type. The faucet should slide or thread on smoothly without resistance.
Key installation points include:
Ensuring correct alignment before tightening
Using sealing tape where required
Tightening firmly but not excessively
Confirming the spout sits flush against the wall or deck
Deck-mounted and multi-piece faucet installations may require securing mounting nuts from below and connecting flexible supply lines. Bathtub faucets from HAOJIAJIA are typically designed with standardized interfaces that simplify this step and reduce installation errors.
If the replacement includes handles or trim, these components are installed after the main spout or faucet body is secured. Trim pieces are not only decorative but also protect internal valves from moisture intrusion.
At this stage:
Install escutcheons or trim plates evenly
Secure handles according to manufacturer torque guidelines
Ensure smooth handle movement without binding
Improper handle alignment can lead to uneven wear inside the valve, so careful positioning is important.
After installation, the water supply can be restored gradually. Testing ensures the faucet functions correctly before the project is considered complete.
Testing should include:
Running hot and cold water separately
Observing all connection points for leaks
Checking water flow direction and pressure
Confirming handles shut off water completely
Any sign of dripping or moisture should be addressed immediately. Early correction prevents hidden water damage behind walls or under tubs.
Replacing a bathtub faucet is not just a repair but also an investment in long-term comfort and reliability. Proper use and basic maintenance help extend the lifespan of the new installation.
Recommended practices:
Avoid overtightening handles during use
Clean mineral deposits regularly
Inspect connections periodically
Address small leaks promptly
Well-constructed faucets, such as those in the HAOJIAJIA bathtub faucet range, are designed to balance durability, ease of installation, and ongoing serviceability.
Replacing a bathtub faucet involves more than swapping visible parts. It requires understanding the faucet type, preparing the plumbing correctly, installing with proper alignment, and testing thoroughly. When done carefully, the process restores reliable water control and refreshes the bathroom’s appearance without unnecessary structural changes. Choosing a compatible, well-engineered faucet simplifies replacement and supports long-term performance. With proper preparation and attention to detail, replacing a bathtub faucet becomes a straightforward and rewarding upgrade.

 Mobile Phone:
 Phone:
 Contact Now